Similar to vendors, when importing customers into
Dynamics GP you can decide to bring in just the minimal information or a
lot of details for each customer. This is another example where classes
can be used to default most of the details about a customer to save a
lot of work during the import. The following example shows a customer
import with just a few basic fields of data and one address.
Columns used for import:
|
Field
|
Max. Length
|
Notes
|
|---|
|
Customer ID
|
15
|
This is required and must be unique. It is recommended not to use special characters in IDs. Customer IDs should be all in caps.
|
|
Customer Name
|
65
|
Required field—this will automatically copy to the Statement Name and the first 15 characters will copy to the Short Name.
|
|
Class ID
|
15
|
Optional, but recommended. This should be a Class ID that is already created in Dynamics GP.
|
|
Primary Address ID
|
15
|
Required. Even if there is no address for some customers, import an
Address ID to avoid errors. The Ship To, Bill To, and Statement To
Address IDs will also be set to this by default if no other Address IDs
are specified.
If you are importing multiple addresses for customers you can set up an
additional file with the addresses, similar to the example above for GL
transactions.
|
|
Contact
|
60
|
All the address fields are optional. Even if there is an Address ID
used, there is no requirement to have an address.
If default Dynamics GP reports will be used it is recommended not to
populate the Address 3 field, as it will not show up on out-of-the-box
reports, including customer invoices and statements.
|
|
Address 1
|
60
|
|
Address 2
|
60
|
|
City
|
35
|
|
State
|
29
|
|
Zip Code
|
10
|
|
Country
|
60
|
|
Phone 1
|
14
|
Phone and fax numbers need to be formatted as numbers only—a 10 digit
number and a 4 digit extension. Example: 21255512120000 will represent
(212) 555-1212 with no extension.
|
|
Fax
|
14
|
Using the listed fields, the following are the steps to set up a customer import destination mapping:
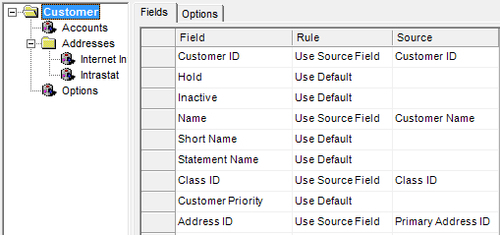
1. Select Customer on the left and map the following fields to the fields in your source file:
Customer ID
Name
Class ID
Address ID
Leave all the other default settings, the screen will look like the following:
2. Select Addresses on the left and map the address fields from your source data:
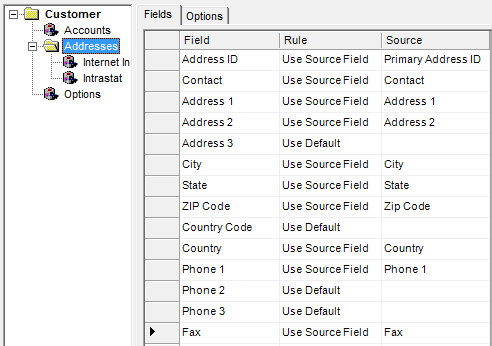
All the other settings can be left as defaulted by Integration Manager. Once imported you can check the Customers SmartList to see your customers.